Monthly Archives: December 2011

Almond Joy Bars

Okay, so this recipe didn’t quite turn out as well as I had hoped. They tasted really good! But the crust was too crumbly 😦 But I got good reviews anyhow, people seemed to like them! So…

Here’s What You Need:

10 tbls butter, room temperature (possibly more)

3/4 cup brown sugar (I used dark, but you can use light)

2 1/2 cups flour (possibly less)

1/2 tsp fine sea salt (regular salt would work too)

28 ounces sweetened condensed milk (I only used about half of that)

28 ounces shredded coconut (I only used about half)

1 tsp vanilla (if you are using the full 28 oz milk/coconut the I would suggest 2 tsp vanilla)

5 cups chocolate baking chunks (I used 1.5 bags of regular chocolate chips)

Okay, here we go….! Preheat oven to 350. Line your baking pan. You can use aluminum foil and baking spray, but if you can, go get some of this! It’s Reynolds Non-Stick Pan Lining Paper. It has one side parchment paper and one side foil. You put the foil side down in the pan, and the parchment side allows you to easily get your food out. And its easy clean up!

Back to the recipe. In a bowl mush together the butter and brown sugar until it is well combined. Add the salt, then SLOWLY add the the flour until the mixture turns to a chunky bread crumb consistency. I don’t think you need all 2 1/2 cups flour…if you do use all 2 1/2 cups, then you probably will need more butter. Mine turned out to be more like a sandy consistency, but I went ahead and used it like that. I could still press it into the pan, but after it was cooked it was a little crubmly when I cut it.

Put the mix in your lined pan and smash it down into an even layer. Now bake it for 8 minutes!

Next mix together the sweetened condensed milk, coconut, and vanilla. I used just a little more than half of the 28 ounces of the milk and coconut. If you use ALL of it, you will have A LOT of coconut on there. But maybe you like it like that! Just make sure your pan is deep enough, or it will be falling over the edges. Once its all combined, just spread it over the top of your crust (because my crust was so crumbly, I couldn’t spread it…I took handfuls of the coconut mix and just pressed them over the crust). Oh yes, and DON’T FORGET to lick the bowl! The coconut/condensed milk mixture is SO DELICIOUS!

Bake for about 20 minutes, or until the coconut begins to brown.

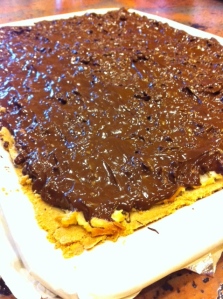
Last step! Melt the chocolate (you can do this on the stove, in the microwave, whatever works best for you!) and spread over the stop of the coconut. Put it in the fridge for about an hour to let it harden, then take it out and cut it up! It was really tasty…just be careful when making that crust!

I will make this recipe again. I need to try it again to make the crust better! I give the recipe 4 out of 5 stars…maybe I would give it 5 stars if the crust had turned out.

Have you made these Almond Joy Bars? Let me know what you thought!

Peanut Butter Fudge

Do you like peanut butter? Then YOU…WILL…LOVE…THIS. The rich creaminess of fudge and all the delicious glory of peanut butter. I need not say more…

You Will Need:

4 cups sugar

1 cup brown sugar

1/2 cup (1 stick) butter

1 (12 oz) can evaporated milk

1 (7 oz) jar marshmallow creme

1 (16 oz) jar of peanut butter

2 tsp vanilla extract

Step 1: Grease a 9×13 baking dish.

Step 2: In a large pot combine sugar, brown sugar, butter, and evaporated milk. The recipe calls for light brown sugar, but I always use dark brown. I just prefer the the richness of the color. Anyhow…bring to a boil, stirring almost constantly. Once it reaches a full boil, boil for exactly 7 minutes! A full boil looks like this 🙂

Step 3: Remove from heat and stir in the marshmallow creme…yum! Next, stir in the peanut butter and vanilla until its all mixed in and smooth! Doesn’t it smell delish?!

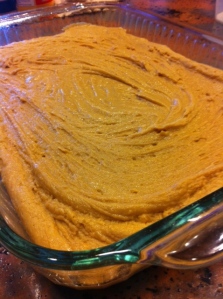
Step 4: Pour into your greased dish and smooth out the top. Let it sit for several hours, or even overnight.

My helper fell asleep on the job…but he’s pretty cute so I guess I’ll let it slide 🙂

So, my hubby doesn’t eat things with peanut butter and so he refuses to try the fudge. But I took one bite and I was HOOKED! It tastes like a Reeses peanut butter cup (minus the chocolate, of course). So so so good! 5 out of 5 stars and I will most certainly be making this again.

Have you made this peanut butter fudge? What did you think?

Homemade Calzone

So, in the Altmyer house pizza is a staple. Bread. Cheese. Ranch. Yep- love it. I’ve attempted to make calzones before, but I haven’t had a ton of success with them…and none of them looked as nice as this one did! So I pinned this mostly because it looked like a fun way to “fold” the calzone.

What You Need:

Refrigerated pizza dough

Pizza Sauce

Mozzarella Cheese

Toppings

First you will need to roll or stretch the dough out to be about the size of your pan. I had mine hanging off the edge a little bit, and that was fine. Spread the sauce down the middle, then top with cheese and whatever toppings you want! We did half cheese (for me) and half pineapple and jalapeno (for the hubbs- his fav). Next, take your food scissors or a knife and cut 3/4 to 1 inch sections down both sides.

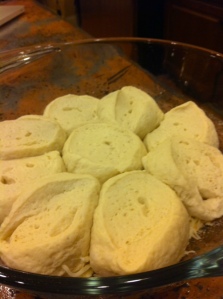
Next, wrap up the baby! Pull one section at a time across the pizza, alternating in a lattice pattern. Careful not to stretch the sections too long…because if you get too much dough piled up it will be difficult to cook all the way through without the top/bottom starting to get too dark.

Here’s what the finished product looked like…I topped mine with pizza seasonings.

I baked mine at 425 degrees for 13 minutes…but you could also bake at 375 degrees for 20-25 minutes. It smelled YUMMY and it looked so pretty! I served ours with some warm marinara and ranch dressing for dipping 🙂

This calzone was a hit! So easy, and looks really good too! Would be very easy to throw a few of these together for a large group, took maybe 5 minutes to prep it- and then only 15 minutes to cook! We rate it 5 out of 5 stars.

Have you made this recipe? Tell me what you thought!
Parmesan Pull-Aparts

Who the heck doesn’t loooooove garlic bread?! Or any kind of bread for that matter. I don’t know anyone. So needless to say, when I pinned this I was super anxious to get cookin’. The original recipe can be found here: http://life-as-a-lofthouse.blogspot.com/2011/06/parmesan-pull-aparts.html

What You Need:

1 can refrigerated biscuits

3 tbls butter

Garlic Powder

Dried Minced Onion

Parmesan Cheese

Mozzarella Cheese

Now, I don’t know about you- but I always shop on a budget. This week the Pillsbury Simply French Bread was on sale, so that’s the refrigerated biscuits that I bought. And it was really good! When I make these again, I’ll definitely use the same thing.

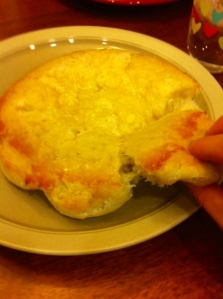
Now, cut the butter into small pieces and spread across the bottom of the pie dish…then sprinkle with the garlic powder and minced onion. WARNING: You might be tempted to go all-out with the garlic and onion, but trust me, don’t. There is plenty of flavor in the parmesan cheese. Okay, after the garlic and onion, sprinkle with the cheeses (I didn’t measure, I just liberally sprinkled 🙂 ). Place the biscuits on top of all that. Bake at 425 for 15-18 minutes. It smells GOOOOOOD!

They. Were. So. Good. Me and the hubby chowed DOWN! Oh so yummy. We rate this 5 out of 5 stars and I will absolutely be making these again!

Have you made this recipe? Tell me what you thought!

Two Timin’ Pasta

Okay so this recipe was super duper easy, and if you’re feeding a big family it’s pretty cheap! Some of us like marinara on our pasta…some of us like alfredo. But some of us like BOTH! I pinned this because it sounded quick, easy, and of course- sounded like something my hubby would enojy 🙂

What You Need:

Penne Pasta

Marinara

Alfredo

Mozzarella and Parmesan cheese

Just cook the pasta according to the package…meanwhile, mix the two sauces together in a separate bowl.

Next, pour the sauce into the cooked pasta and toss to coat. Then, sprinkle with the mozz and parmesan cheeses. Warm all the way through. It’s starting to look yummy!!!

Now, at this point the original recipe says to put the pasta in a baking dish and then bake it for about 20 minutes. I don’t always love baked pasta dishes, so I didn’t do that part. I just dished it up and served it!

Now, here is the part where I rate the recipe…my hubby and I agree, we give it 3 out of 5 stars. The flavor was okay, the consistency was good, but it just wasn’t as delicious as I had hoped 😦 Unfortunately, I don’t think I will be making this again.

Did you make this recipe? Tell me what you thought!

I pin it, I make it!

I am officially a Pinaholic! I spend faaaaar too many hours on Pinterest. Most days it takes all I have to pry myself away from the computer just to get anything done around the house! But, I do make tons of the recipes I find on there…and so this is my Pinterest food blog. I pin it, I make it!