Terra Cotta Tower

Okay, so the link on Pinterest isn’t working, so I can’t post the original link here! Ugh. But anyways…the general idea was to stack terra cotta pots on top of each other, using rebar to hold them in place! Super cute. I had to run right out and get my supplies, because I was dying to add this to my front yard!

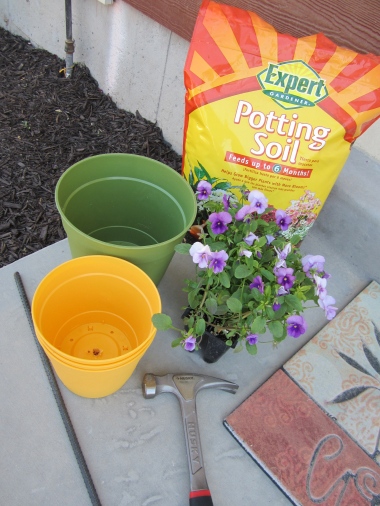
Okay, so here’s what you need:

a hammer

3 ft of rebar ($1.50 at Home Depot)

4 terra cotta pots (I used plastic pots, they were much lighter and came in cute colors!) ($5.00 total at Walmart)

potting soil ($3.00 at Walmart)

flowers ($2.00 at Walmart)


Image


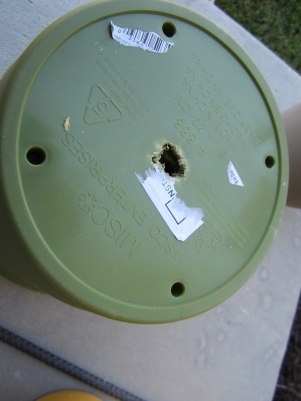
First things first – I needed to make some holes in the bottom of the pots (because unlike terra cotta pots, these didn’t have any). This was the hardest part of the whole project! First I went digging through the garage and found my hubby’s drill. I made a hole in the bottom of each pot, but they weren’t nearly large enough. I sat there looking at those dang holes trying to figure out how I could make them bigger (this is where it would have been nice to have my hubby home!). Eventually I decided that a finger nail file would be perfect to try and file the hole bigger. After some more digging I found this thing that had a handle like a screwdriver but had this big metal file thingy attached to it. Perfect! It worked wonders. I made a hole like this on the bottom of each pot…


Image


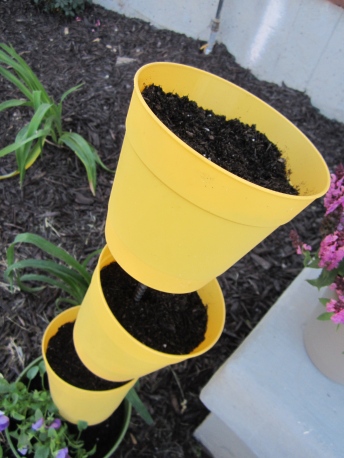
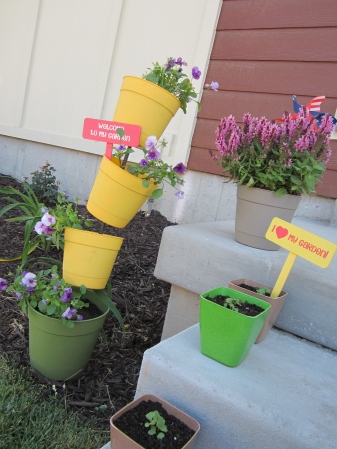
Next I used the hammer to pound the rebar into the ground, about 8 inches…but you could do more, it would make it extra sturdy. Then I put each pot on the bar, leaving a little space between each one. If you are using terra cotta pots, you need to have each pot resting on the one below it, because it’s too heavy. But since I was using these light-weight plastic pots, they stayed up really well. I filled each pot with some soil, then planted a couple of flowers in each one. Super easy.


Image


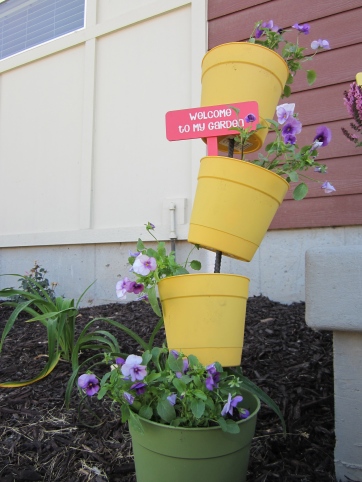
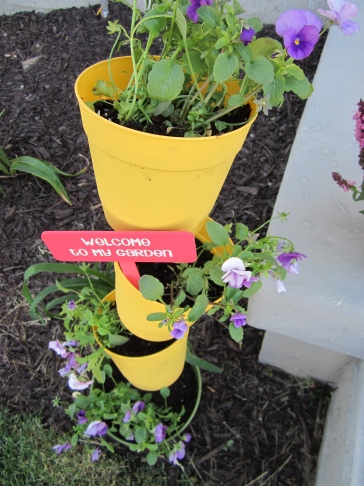
I’m pretty pleased with the final product! Adds a pop of color to my yard, and for only $12.


Image

Image


AND, my radishes have sprouted! Yippee!


Enjoy! 🙂
 

Tagged , ,

Zucchini Tots

I’ve always wished that I liked zucchini more…but really, the only way I truly love to eat the stuff is smothered in butter. haha. Okay, so that’s not so healthy. I found this pin today, and I was actually already planning on making zucchini with our dinner, so I gave it a try! The original recipe can be found here: http://curiouscountrycook.blogspot.com/2012/03/zucchini-tots.html

What You Need:

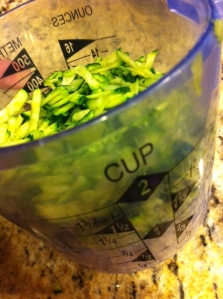
1 cup grated zucchini

1 egg

1 cup diced onion

1/4 cup (more or less, depending) bread crumbs

A sprinkle of cheese (original called for 1/4 cup, I just sprinkled it)

Salt and Pepper

Grate your zucchini and dice your onion. The original recipe says to dry the grated zucchini in a towel, but honestly I forgot to. Mine turned out fine, so I guess that’s one less step for you!

Next, mix together your zucchini, onion, egg, bread crumbs, and salt and pepper.

Drop spoonfuls of the mix into your greased MINI muffin/cupcake pan. Don’t use the regular sized muffin pan, they just won’t hold together as well and won’t crisp up as nicely as the mini. Sprinkle the tops with cheese.

Bake at 400 for 15-20 minutes.

They smelled pretty good! And they are cute 🙂 Mark really liked them, although he seemed pretty leery of them at first LOL I thought they were okay, but kind of bland. I feel like they need something more…but I just can’t figure out what! I guess I’ll rate them 4 out of 5 stars, since I would have given them 3 but Mark would give them 5. I’m sure I’ll make them again.

Have you made the Zucchini Tots? What did you think?

Crispy Sweet Potato Fries

I have seriously  been on a sweet potato kick lately, I just can’t get enough of ’em! These looked delicious and I’ve been wanting to make them for a while now. Original can be found here: http://www.theartofdoingstuff.com/guaranteed-crispy-sweet-potato-fries-sriracha-mayo-dip/

So, here’s what you need…

2 sweet potatoes

2 tbls cornstarch

olive oil

sea salt and pepper

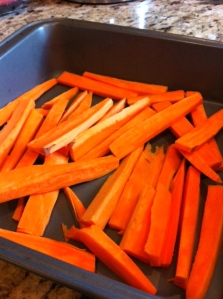
These are super easy…first, peel and slice your sweet potatoes. Make the slices moderately thick, if they are too thin they will just burn in the oven. Once those puppies are sliced you need to soak them in water for 30 minutes to an hour. Don’t they look like carrots?!

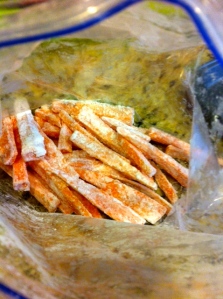
Next, put your cornstarch in a big ziplock bag and shake your sweet potatoes up. They don’t need to have a thick coating, just lightly coated. Too thick and you will have the flavor of the cornstarch even after you cook them.

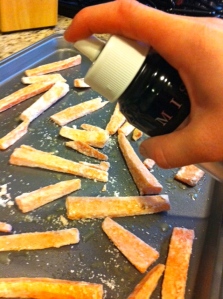
Now, spread them out on a cookie sheet making sure they have plenty of space in-between each fry. Too close and they won’t crisp up. The original recipe said to drizzle olive oil over the fries, but I used my olive oil spritzer. Then I sprinkled sea salt and pepper.

Bake at 425 for 15 minutes, flipping them over after 10 minutes. I served our sweet potato fries with crunchy onion pork chops (also Pinterest!) and a mozzarella, tomato, pesto mix. Oh, and of course RANCH for dipping!

These were a HUGE hit with my husband! He loved them, I loved them. 5 out of 5 stars! I will certainly be making them again 🙂

Have you made the crispy sweet potato fries? What did you think?

Cake Batter Pudding Cookies

So I pinned this one a while ago, and never really felt the urge to make them. Then my sister in law made them one night and brought them over….bad bad news. I ate like 20 cookies. So I decided to make them! They are super easy (although it has a slightly longer list of ingredients than what I normally prefer) and will definitely be a crowd pleaser!

What You Need:

3/4 cup butter (room temp)

3/4 cup brown sugar

1/4 cup white sugar

1 (3.4 oz) instant vanilla pudding mix

3/4 cup yellow cake mix

2 eggs

1 tsp vanilla

1 tsp baking soda

2 1/4 cup flour

1/2 tsp salt

sprinkles!!!

Okay, here we go….! Cream together the butter and sugars together. Next, add the dry pudding mix and cake mix and beat until well blended.

Add eggs and vanilla, mix until smooth.

In a separate bowl mix together the flour, salt, and baking soda. Then slowly add the flour mixture into the wet mixture until completely incorporated.

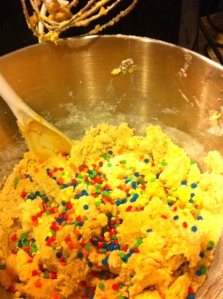
Now it’s time for the SPRINKLES!! I should have used more 😦

Roll into 1 inch balls, place on greased baking sheet and bake at 350 for 10-12 minutes! See my baking sheets? They are getting kinda beat up…my hubbs said he will buy me new ones for valentines day 🙂

Here they are…

Enjoy! They certainly are delicious. I froze some of the leftover dough so that I can pop some in the over whenever I feel like eating a few haha Love ’em, and I will absolutely make them again.

Have you made the Cake Batter Pudding Cookies? What did you think?

Tagged

Chicken Bacon Ranch Mac n Cheese

Oooooh boy!!! I’m a HUGE mac n cheese fan. But mac n cheese with two of my other favs…bacon and ranch?! Yes please. I was salivating the whole time I was making this 🙂

The original can be found here: http://firstlookthencook.com/2010/02/26/bacon-ranch-and-chicken-mac-and-cheese/

What You Need:

1 cup (8 oz) elbow macaroni

3 slices bacon (original called for only one slice. ha. puh-lease. ONE slice?!)

1 cup (8 oz) chicken breast, cut into small cubes

1 tbls butter

1 tbls powdered ranch mix (original called for flour – I’ll explain more about this later)

1 1/2 cups milk

1 can cream of mushroom soup (original called for 1/3 cup)

1 1/2 cups shredded cheese, I used a colby jack and mozzarella

1/2 tsp garlic powder

1/2 onion powder

1/2 tsp salt

(original called for 1/2 tsp fresh dill, I didn’t use it)

Cook pasta, drain, and set aside. Cook bacon until crisp, remove from the pan, finely chop. Then cook the chicken in the bacon drippings, until browned. I didn’t do this, only because I had the bacon cooked from the day before. Otherwise I would have cooked the chicken in the bacon drippings.

Melt butter and ranch mix in a large sauce pan for 2 minutes, stirring frequently. So above in the ingredients you can see that I used ranch mix instead of flour. When I read through the original recipe I was like “Where is the ranch? I thought this was a ranch mac n cheese?!” Totally bugged. Apparently the flavors are supposed to mix together and taste like ranch. Well, I wasn’t taking any chances! So in with the ranch mix…

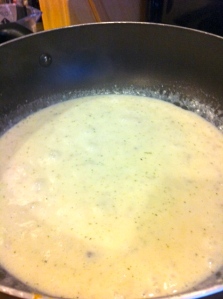
Add the milk and soup to the butter mixture, stirring with a whisk until well combined. Bring to a boil. Cook until it thickens.

Remove from heat and add in almost all of the cheese, saving just enough to sprinkle over the top once it’s in the baking dish. Add in the pasta, chicken, bacon, and seasonings. Mix until well combined.

Pour the mixture into a baking dish, sprayed with Pam or otherwise greased. Place in the broiler for a few minutes, watching until the top begins to bubble and slightly brown.

It doesn’t look too pretty, but let me tell you…YUM. It was SO GOOD. So good in fact that I went back for seconds (which I never do!). My hubby took one bite and refused to eat any more, he thought it was gross. Something about the bacon…he’s crazy. My little brother ate some leftover the next day and he said it delicious!

I will definitely be making this again! Although, it will probably be in a smaller amount since I’m the only one eating it LOL I give it 5 out of 5 stars for sure! I want some more right now…

Have you made the Chicken Bacon Ranch Mac n Cheese? Tell me what you thought!

Crockpot Chicken and Gravy

This recipe here just seemed really simple and traditional- chicken and gravy! Even better, this one was for the crockpot. If you make this recipe just as it was from the pin, it would be pretty bland. I added a few things, and next time I would add even more. I’ll show you how I made it this time…

What You Need:

2 chicken breasts

1 can cream of mushroom soup (original called for cream of chicken)

1 packet brown gravy mix (original called for chicken gravy mix)

1 cup of water (original did not call for any water)

Salt, pepper, minced onion (original did not call for any spices)

steamed rice

Combine all the ingredients in the crockpot, except the rice, and cook on low for 4-6 hours or on high for 2-3 hours.

I had set my crockpot on high for 3 1/2 hours, but after about 2 hours I realized I didn’t need to cook it for that long. So for the remaining time I set it on low. After it’s done cooking I pulled the chicken out and shredded it in my Kitchen Aid mixer (another fantastic Pinterest idea!). Then put it back in and mixed it all together. At this point you could either mix the rice into the chicken and gravy mixture, or you can serve the chicken and gravy on top of the rice.

I served it on top of the rice, that’s how my hubby likes it. We had some broccoli and cheese with it.

Okay, so this was pretty good. Like I said, traditional! Me, my hubby, and my brother Lucas would rate this 4 out of 5 stars. Next time though, we would add a few more things to the chicken and gravy: garlic powder, minced garlic, and additional minced onion. You will also want to have a good amount of pepper in there. With all that, we think this would be great! My hubbs asked for me to make it again, so I guess that means it was good 🙂

Have you made the Crockpot Chicken and Gravy? Tell me what you thought!

The Best Cornbread

I’m a born-and-raised Southern California girl…but sometimes I really think that I simply belong in the South. Southern food just makes me so happy! Cornbread is one of my all-time favorites, so when I found this Pin that claimed to be “The BEST cornbread ever!” I was all over it. Even the most novice of cooks could make this easy recipe. The original can be found here: http://thepearsonfamilee.blogspot.com/search/label/breads

Here’s what you need:

2 cups Bisquick

6 tbls cornmeal

1/2 cup sugar

1/2 cup butter

2 eggs

1 cup milk

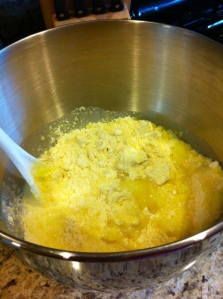
Start by mixing together the Bisquick, cornmeal, and sugar.

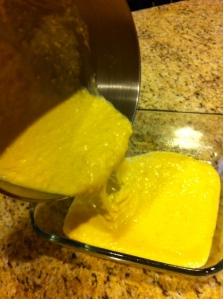
Next you will melt the butter, then add the milk and eggs to the butter. Mix it all together and then add it into the bowl with the cornmeal mix.

Stir until well combined. Make you you get it all! It’s really easy to have a pocket of dry mix still left at the bottom. Now, pour it into a greased 8×8 baking dish! At this point you are free to lick the bowl. I looove raw  cornbread mix!

Bake at 350 for about 30 minutes, or until it starts to turn golden brown on the top. Don’t over-bake!

This really was some delicious cornbread! My husband, my little brother, and myself had it with our crispy cheddar chicken for dinner. It went quick!

This is certainly a 5 out of 5 star recipe that I can’t wait to make agin! Quick, easy, and cheap. Love it!

Have you made the Best Cornbread recipe? How did you like it?

Almond Joy Bars

Okay, so this recipe didn’t quite turn out as well as I had hoped. They tasted really good! But the crust was too crumbly 😦 But I got good reviews anyhow, people seemed to like them! So…

Here’s What You Need:

10 tbls butter, room temperature (possibly more)

3/4 cup brown sugar (I used dark, but you can use light)

2 1/2 cups flour (possibly less)

1/2 tsp fine sea salt (regular salt would work too)

28 ounces sweetened condensed milk (I only used about half of that)

28 ounces shredded coconut (I only used about half)

1 tsp vanilla (if you are using the full 28 oz milk/coconut the I would suggest 2 tsp vanilla)

5 cups chocolate baking chunks (I used 1.5 bags of regular chocolate chips)

Okay, here we go….! Preheat oven to 350. Line your baking pan. You can use aluminum foil and baking spray, but if you can, go get some of this! It’s Reynolds Non-Stick Pan Lining Paper. It has one side parchment paper and one side foil. You put the foil side down in the pan, and the parchment side allows you to easily get your food out. And its easy clean up!

Back to the recipe. In a bowl mush together the butter and brown sugar until it is well combined. Add the salt, then SLOWLY add the the flour until the mixture turns to a chunky bread crumb consistency. I don’t think you need all 2 1/2 cups flour…if you do use all 2 1/2 cups, then you probably will need more butter. Mine turned out to be more like a sandy consistency, but I went ahead and used it like that. I could still press it into the pan, but after it was cooked it was a little crubmly when I cut it.

Put the mix in your lined pan and smash it down into an even layer. Now bake it for 8 minutes!

Next mix together the sweetened condensed milk, coconut, and vanilla. I used just a little more than half of the 28 ounces of the milk and coconut. If you use ALL of it, you will have A LOT of coconut on there. But maybe you like it like that! Just make sure your pan is deep enough, or it will be falling over the edges. Once its all combined, just spread it over the top of your crust (because my crust was so crumbly, I couldn’t spread it…I took handfuls of the coconut mix and just pressed them over the crust). Oh yes, and DON’T FORGET to lick the bowl! The coconut/condensed milk mixture is SO DELICIOUS!

Bake for about 20 minutes, or until the coconut begins to brown.

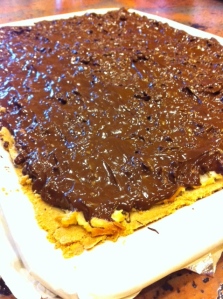
Last step! Melt the chocolate (you can do this on the stove, in the microwave, whatever works best for you!) and spread over the stop of the coconut. Put it in the fridge for about an hour to let it harden, then take it out and cut it up! It was really tasty…just be careful when making that crust!

I will make this recipe again. I need to try it again to make the crust better! I give the recipe 4 out of 5 stars…maybe I would give it 5 stars if the crust had turned out.

Have you made these Almond Joy Bars? Let me know what you thought!

Peanut Butter Fudge

Do you like peanut butter? Then YOU…WILL…LOVE…THIS. The rich creaminess of fudge and all the delicious glory of peanut butter. I need not say more…

You Will Need:

4 cups sugar

1 cup brown sugar

1/2 cup (1 stick) butter

1 (12 oz) can evaporated milk

1 (7 oz) jar marshmallow creme

1 (16 oz) jar of peanut butter

2 tsp vanilla extract

Step 1: Grease a 9×13 baking dish.

Step 2: In a large pot combine sugar, brown sugar, butter, and evaporated milk. The recipe calls for light brown sugar, but I always use dark brown. I just prefer the the richness of the color. Anyhow…bring to a boil, stirring almost constantly. Once it reaches a full boil, boil for exactly 7 minutes! A full boil looks like this 🙂

Step 3: Remove from heat and stir in the marshmallow creme…yum! Next, stir in the peanut butter and vanilla until its all mixed in and smooth! Doesn’t it smell delish?!

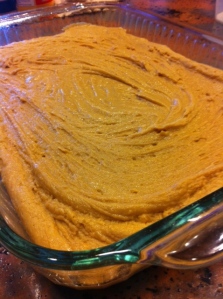
Step 4: Pour into your greased dish and smooth out the top. Let it sit for several hours, or even overnight.

My helper fell asleep on the job…but he’s pretty cute so I guess I’ll let it slide 🙂

So, my hubby doesn’t eat things with peanut butter and so he refuses to try the fudge. But I took one bite and I was HOOKED! It tastes like a Reeses peanut butter cup (minus the chocolate, of course). So so so good! 5 out of 5 stars and I will most certainly be making this again.

Have you made this peanut butter fudge? What did you think?

Homemade Calzone

So, in the Altmyer house pizza is a staple. Bread. Cheese. Ranch. Yep- love it. I’ve attempted to make calzones before, but I haven’t had a ton of success with them…and none of them looked as nice as this one did! So I pinned this mostly because it looked like a fun way to “fold” the calzone.

What You Need:

Refrigerated pizza dough

Pizza Sauce

Mozzarella Cheese

Toppings

First you will need to roll or stretch the dough out to be about the size of your pan. I had mine hanging off the edge a little bit, and that was fine. Spread the sauce down the middle, then top with cheese and whatever toppings you want! We did half cheese (for me) and half pineapple and jalapeno (for the hubbs- his fav). Next, take your food scissors or a knife and cut 3/4 to 1 inch sections down both sides.

Next, wrap up the baby! Pull one section at a time across the pizza, alternating in a lattice pattern. Careful not to stretch the sections too long…because if you get too much dough piled up it will be difficult to cook all the way through without the top/bottom starting to get too dark.

Here’s what the finished product looked like…I topped mine with pizza seasonings.

I baked mine at 425 degrees for 13 minutes…but you could also bake at 375 degrees for 20-25 minutes. It smelled YUMMY and it looked so pretty! I served ours with some warm marinara and ranch dressing for dipping 🙂

This calzone was a hit! So easy, and looks really good too! Would be very easy to throw a few of these together for a large group, took maybe 5 minutes to prep it- and then only 15 minutes to cook! We rate it 5 out of 5 stars.

Have you made this recipe? Tell me what you thought!